Overview
The Route Snow Planner is a report that shows, for one day, every snow service each route may be asked to perform. Run it before a storm to check that each route has the right properties and services, then print it so crew leaders have a paper summary of their work, operations notes, and the materials and equipment each service calls for.
Things to know
The report is organized in five levels: Route > Property > Opportunity > Service > operations notes and items.
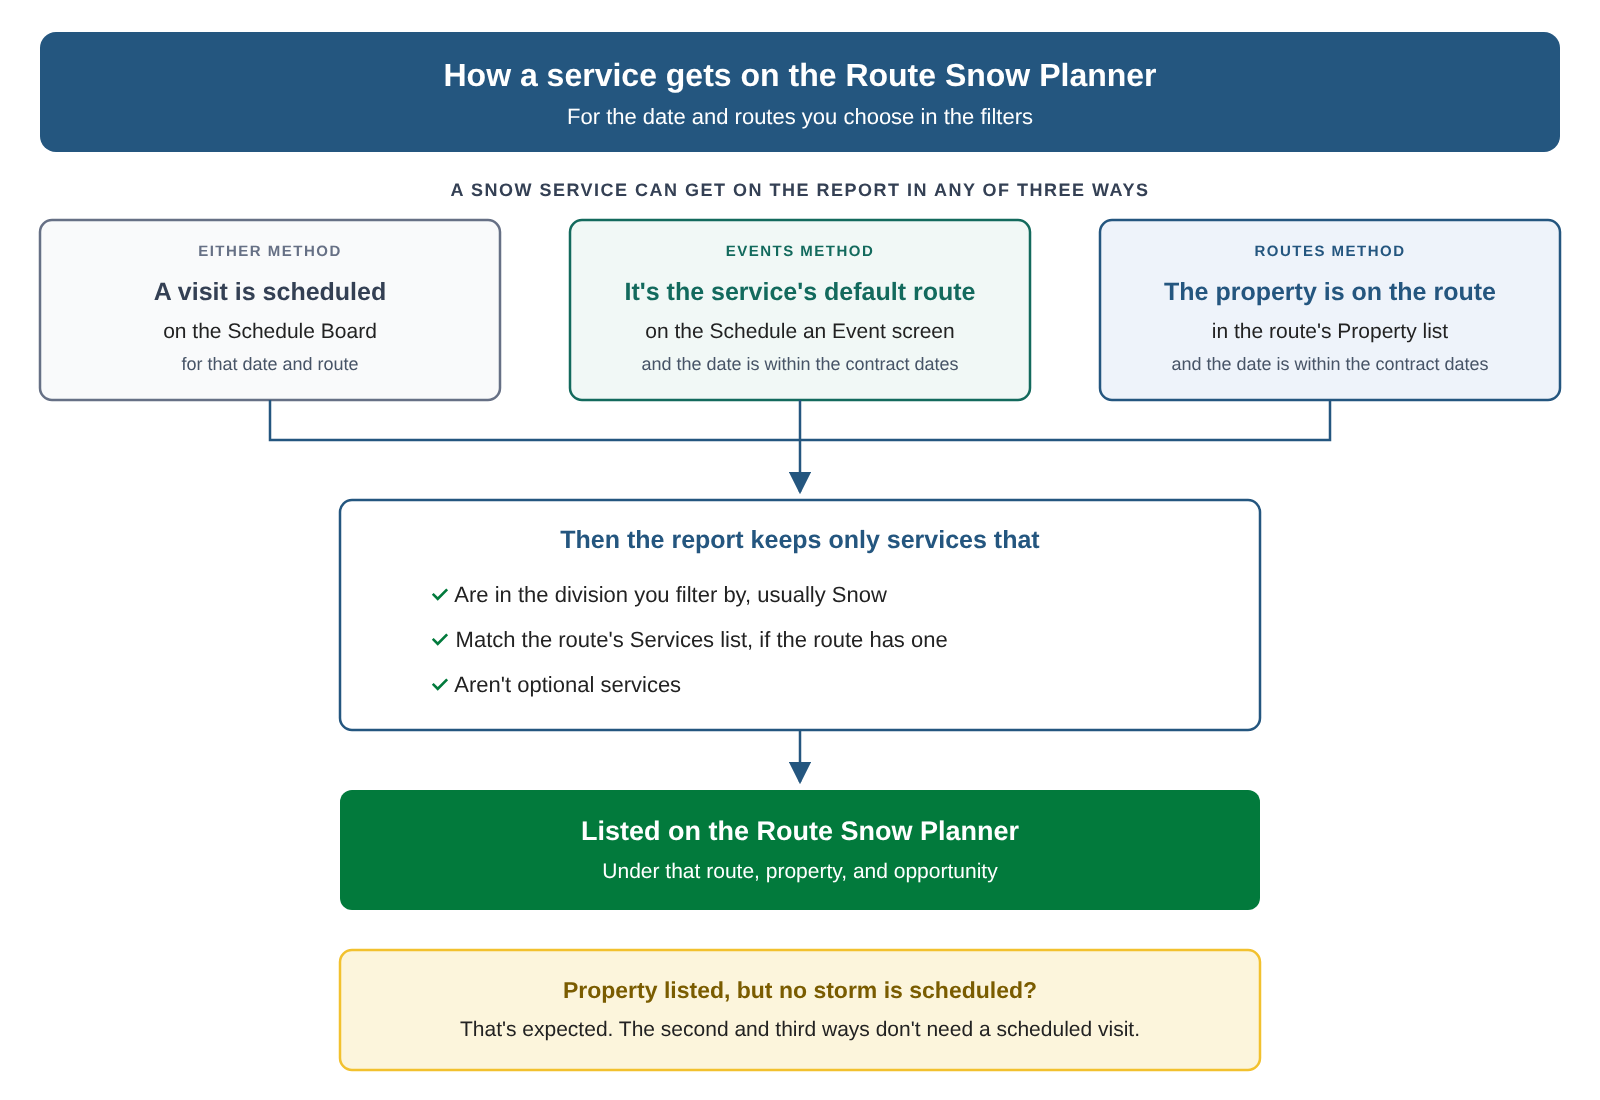
The report shows what a route could work on the date you pick, not only what's scheduled. A service is included in any of these three cases:
A visit for the service is scheduled on the Schedule Board for that date and route.
The service's default route on the Schedule an Event screen is that route, and the date falls between the contract's start and end dates.
The property is on that route's Property list, and the date falls between the contract's start and end dates.
Because of the second and third cases, a property can appear on the report even when no storm is scheduled. That's expected. It tells you which properties the route is responsible for.
If a route lists services or service types in its Services section, the report shows only matching services for that route.
Optional services don't appear on the report.
If a property has Snow Notes, the report shows those notes instead of the operations notes on the service.
The Route Snow Planner works with both the Routes Method and the Events Method. For more information, visit Routes Method or Events Method for Snow Management.
Requirements
To run the report, users must have the View Reports, View Drill Down Reports, and View Drill Down Reports - Route Snow Planner permissions.
Your snow routes must be set up in the Snow division. For more information, visit Setting Up Snow Routes.
Your snow opportunities must be won, with contract start and end dates that cover the date you run the report.
Video
Steps
Run the Route Snow Planner
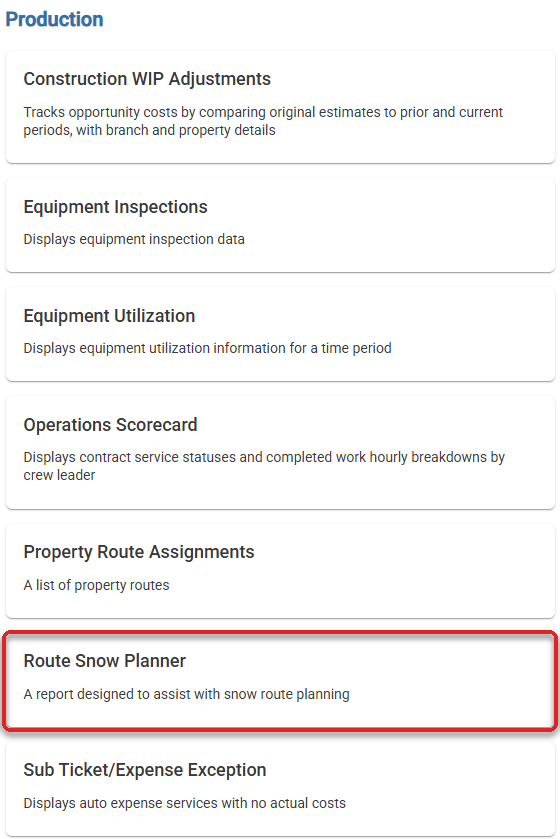
Go to the Reports module, then select the Standard Reports tab.
Under Production, select Route Snow Planner.
Choose the filters at the top of the report:
Date (required): Select the day you're planning for, such as the day the storm is forecast.
Division (required): Select Snow. The report includes only services in this division.
Routes (required): Select one or more routes.
Properties (optional): Select specific properties to narrow the report.
Review the results. The report refreshes automatically as the filters are set.
Read the report
Each route expands into the properties, opportunities, and services it covers for that day.
Route: The route the services are listed for. Route names appear in bold.
Property: Each property the route may service, with its address. Property names appear in bold.
Opportunity: The won opportunities on that property that include snow services.
Service: Each snow service available on the opportunity.
Operations notes and items: Under each service:
The first line shows operations notes, with the formatting from the estimate, such as red text. If the property has Snow Notes, those show here instead.
The second line shows the labor per occurrence.
The lines after that show the materials, equipment, and other items on the service, with the quantity per occurrence from the estimate.
Note: If a visit is scheduled for 0 hours but the service has estimated labor, the report shows the estimated hours from the service.
Check your routes before a storm
Run the report for the day of the storm and look for gaps before crews head out:
Every property you expect the route to clear is listed.
No property is listed on the wrong route.
Each property shows the right services for the forecast, such as plowing, walks, or salting.
Operations notes, such as gate codes or where to push snow, are present and current.
To fix a property on the wrong route, update the route's Property list or the service's default route on the Schedule an Event screen. For more information, visit Making Snow Work Available by Route and Scheduling a Snow Event.
Print the report for crews
With the report open, select the three-dot icon to open the action menu.
Select Print.
Print or save the PDF, then give each crew leader the pages for their route.
Tip: Print the report for crews so they can review each property's Snow Notes before the storm. In Aspire Mobile, crews can't see a property's Snow Notes until they pull a ticket for it.
Note: The Route Snow Planner doesn't have a Save As option. Set the filters each time you run it.
What happens next
Crew leaders have a printed summary of their route's properties, services, notes, and materials. They still report time and materials in Aspire Mobile. For more information, visit Reporting Time and Materials in the Field.
If you use the Events Method, schedule visits from the Schedule an Event screen. For more information, visit Scheduling a Snow Event.
After the storm, review and approve the work tickets. For more information, visit Reviewing Snow Work Tickets Pending Approval.
Troubleshooting
For help with common Route Snow Planner problems, such as a route showing nothing or a property showing when nothing is scheduled, visit Snow Troubleshooting.